▼ WPの本文 ▼
何を使い、どの手順で、どうしたらいいのか、その詳細をご紹介。アイテムの動かし方や手入れの順番もイケ眉になる重要なポイント。動画でもチェックしよう!
用意するもの
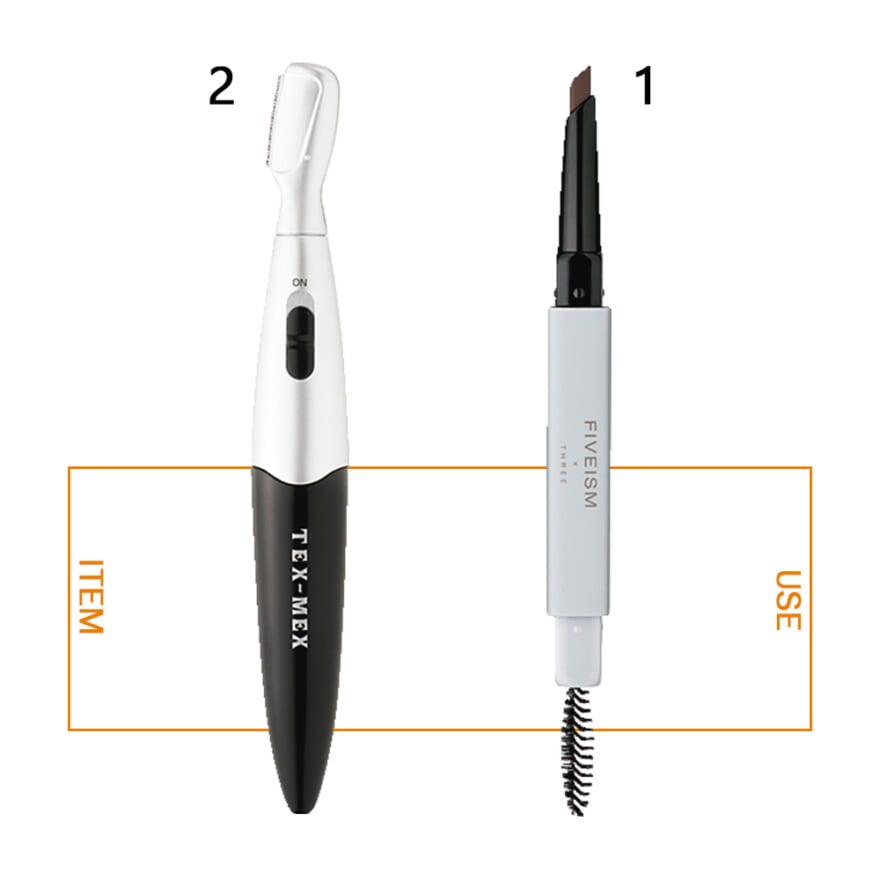
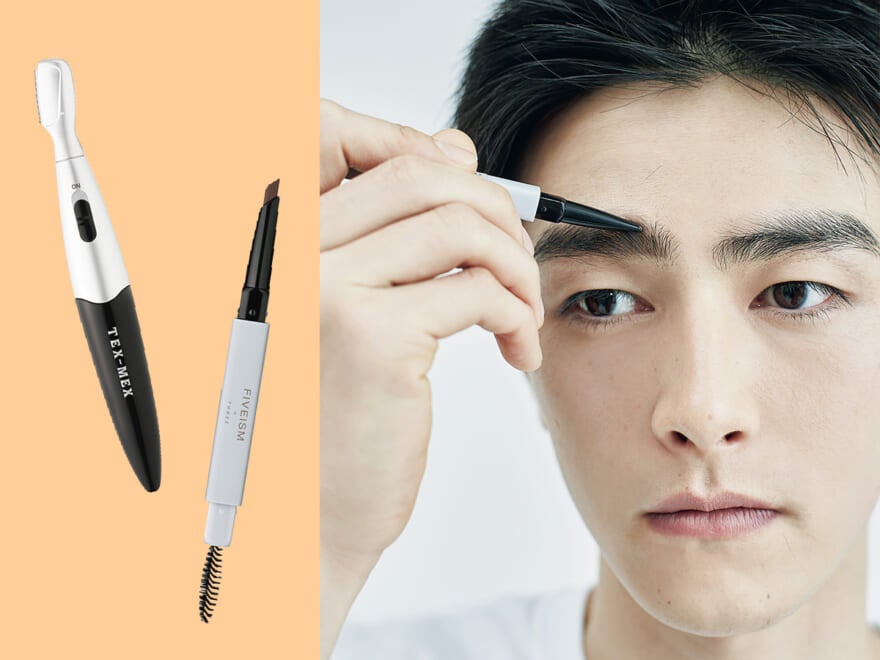
1ブラシ付きアイブロウペンシル
眉を軽くなぞるだけで自然な仕上がりに。ペン先がしずく型で太さや濃さを調整しやすく初心者にも使いやすい。アイブロウスティック(リフィル) 04 ¥2,400・同 ホルダー¥2,000/FIVEISM × THREE
2シェーバー
小さなヘッド部分で細かく手入れが可能。テックスメックス アイブロウ&フェイスシェーバー¥1,880/シャンティ
BEFORE
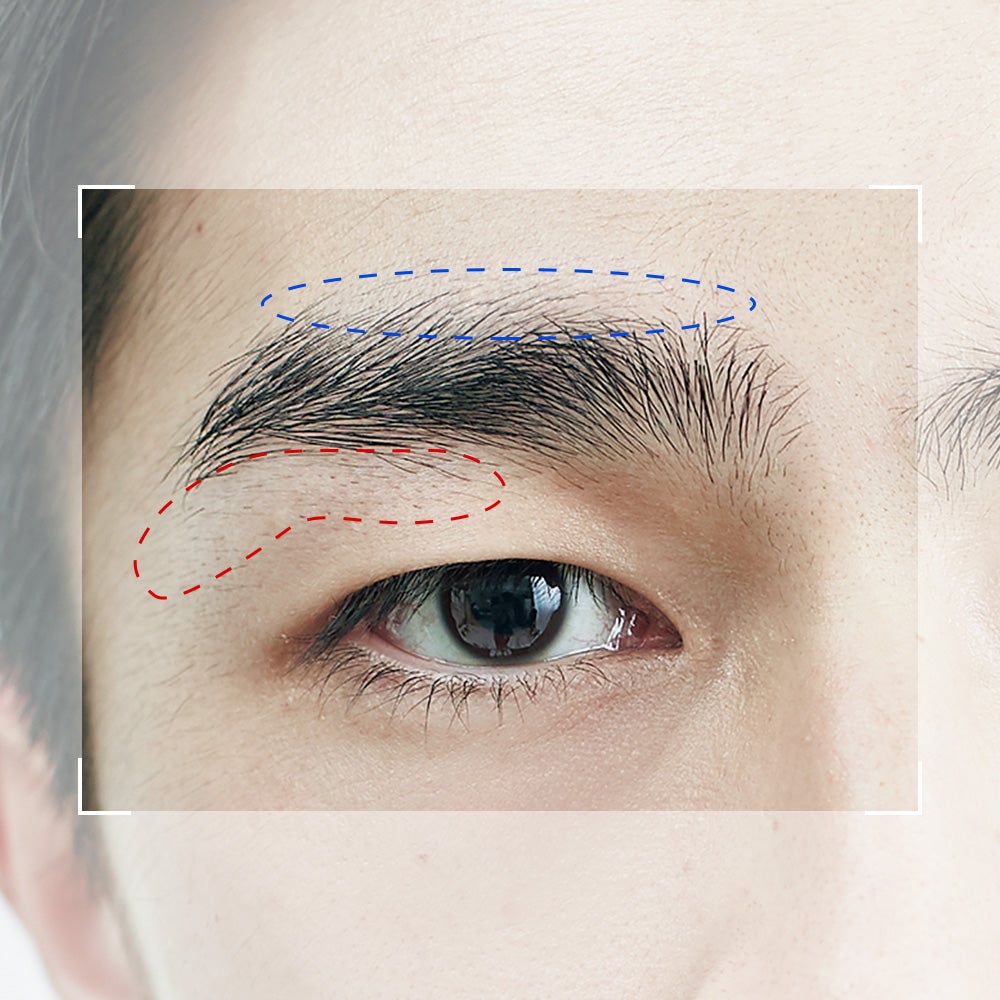
青は生かす、赤を剃る!
青い部分は触らないのが吉。剃る&抜くのは赤の部分。また、剃りすぎ防止のために、先に描いてから剃るのが◎。

START
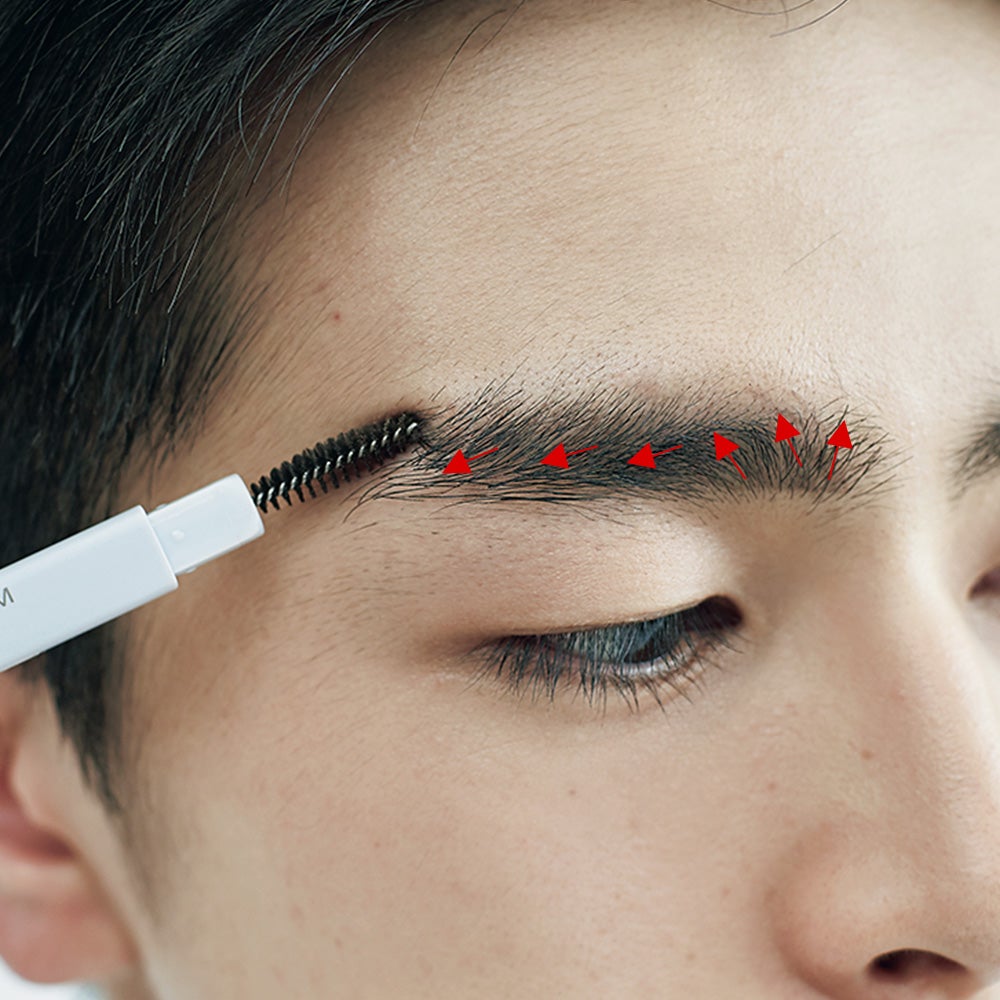
STEP:1ブラシで毛流れを整える
1のブラシのほうを使い、眉頭〜眉中央あたりは下→上、眉中央〜眉尻は上→斜め下に向かって眉毛をとかす。
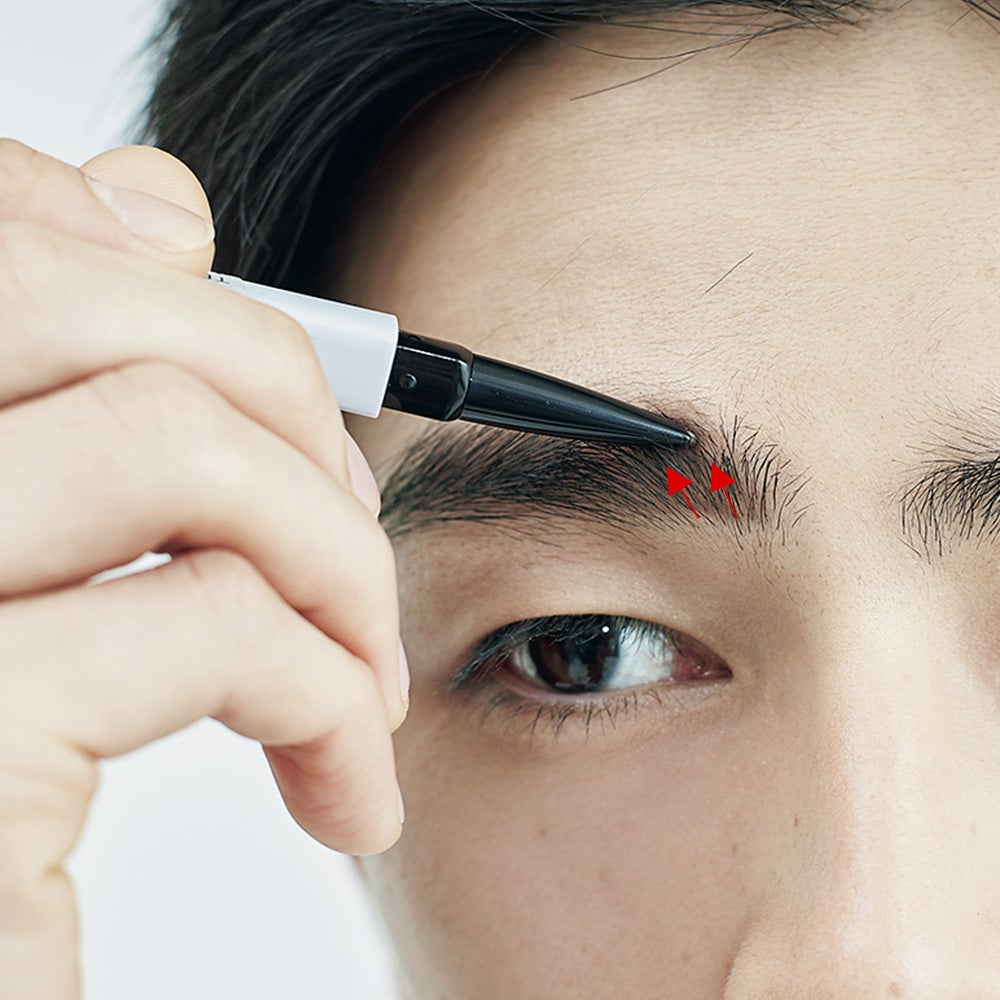
STEP:2眉頭のムラ部分を描き足す
1のペンシルで、眉頭の毛が薄い部分を描き足す。毛が生えているように見せるため、下→上にペンを動かそう。
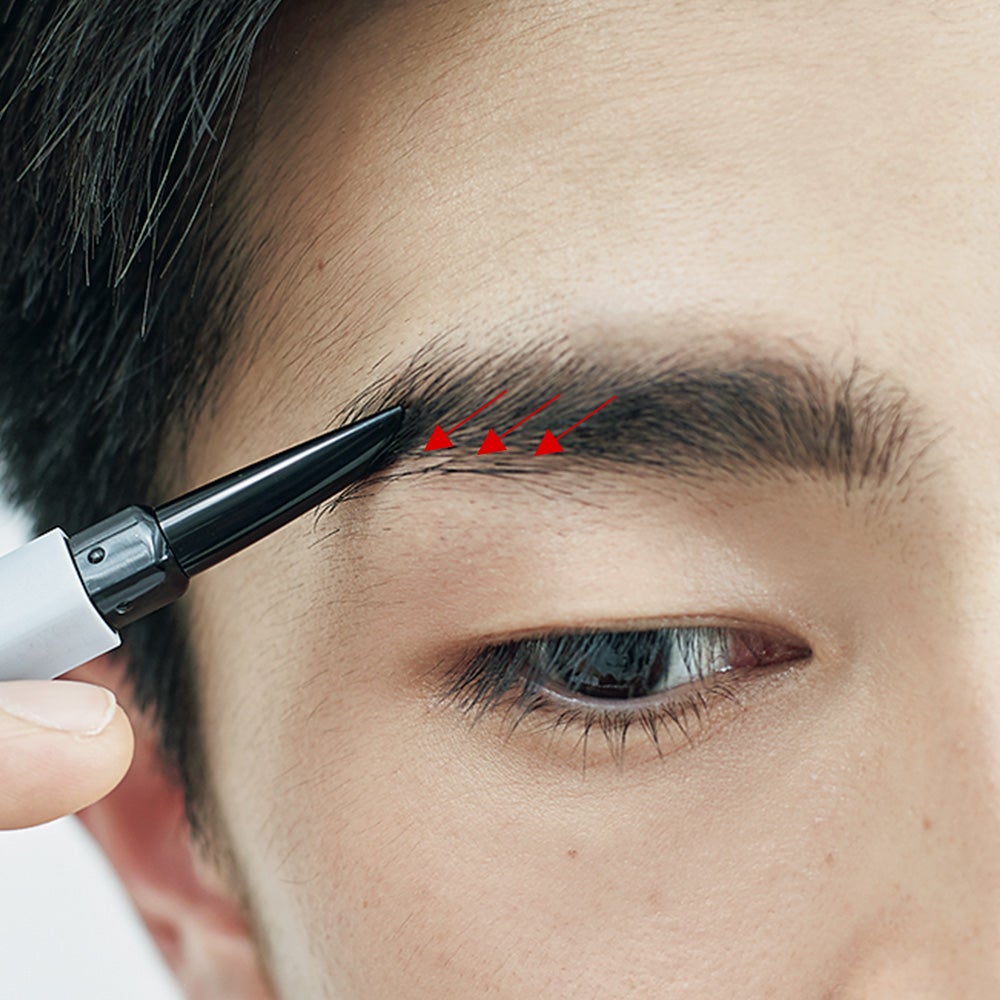
STEP:3その他ムラ部分も埋める
眉中央や眉尻など、ほかのムラになっている部分もペンでプラス。その際も毛流れを意識して、上→斜め下に。
STEP:4左右のバランスを確認
片側の眉を整えたら、下敷きなどを下辺に当てて左右のバランスを確認。下のラインがそろうように意識しよう!
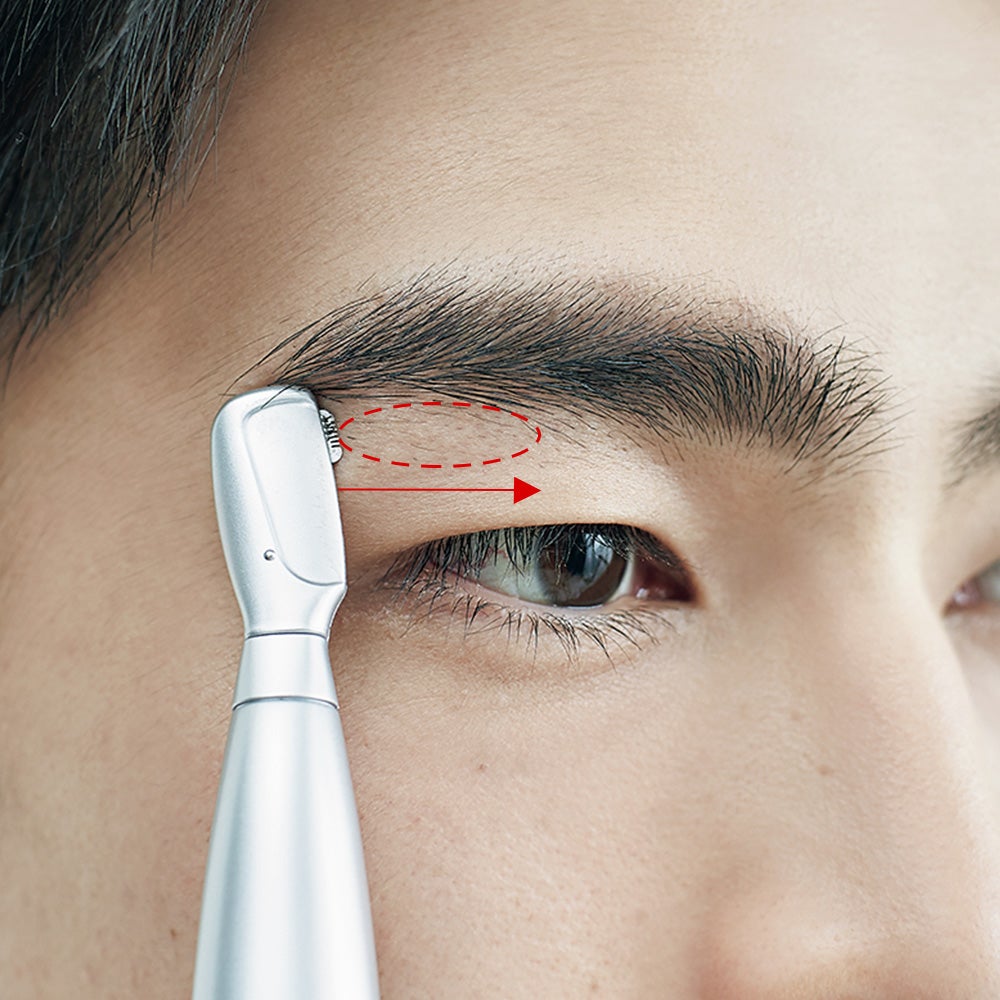
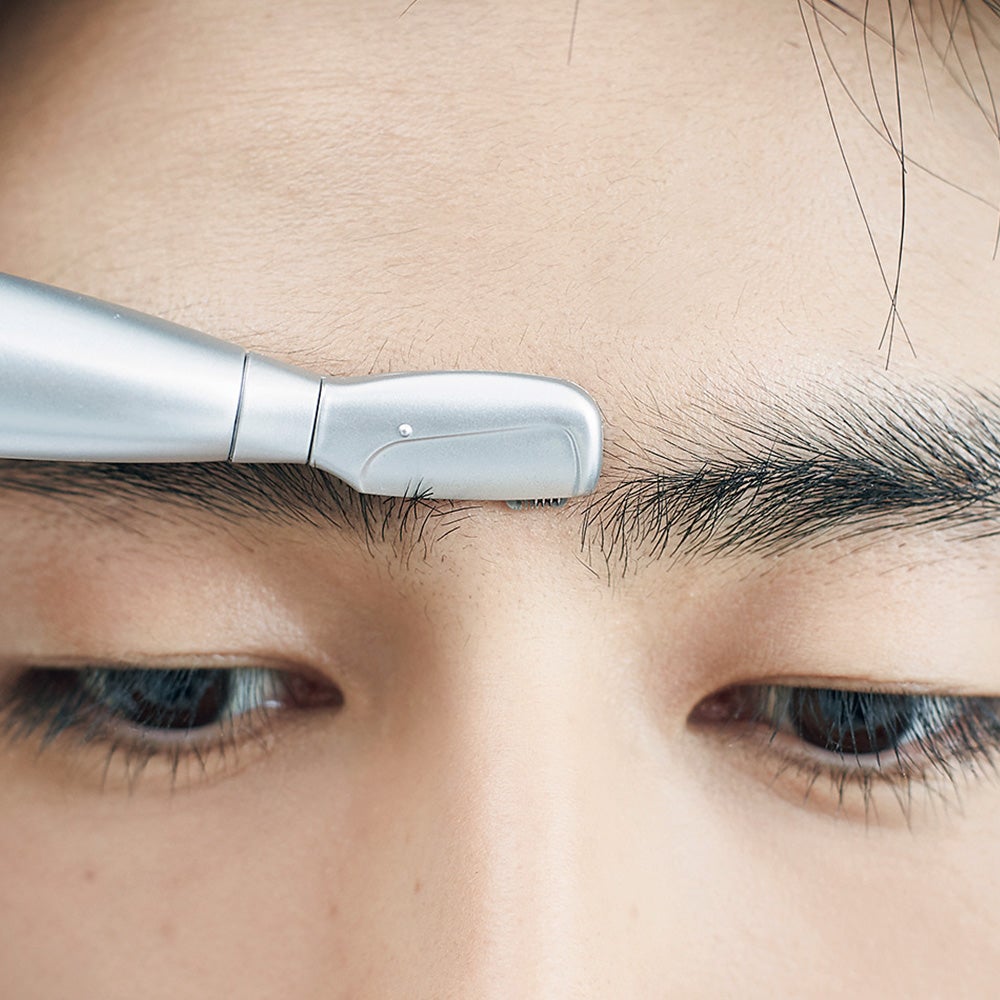
STEP:5"眉下のみ"不要な毛を剃る
1〜3を両眉完了させたら下辺からはみ出している毛のみをカット。毛流れとは逆向きにシェーバーを動かして。
STEP:6眉間の産毛も処理を
つながりそうな眉間の産毛もシェーバーで。毛が薄くて細い産毛は毛流れに沿って剃ると肌への負担も少ない。

STEP:7客観的に仕上がりを見てみる
スマホのインカメラなどを利用して自撮りを。客観的に仕上がりを見てから、気になる部分は調整すべし。
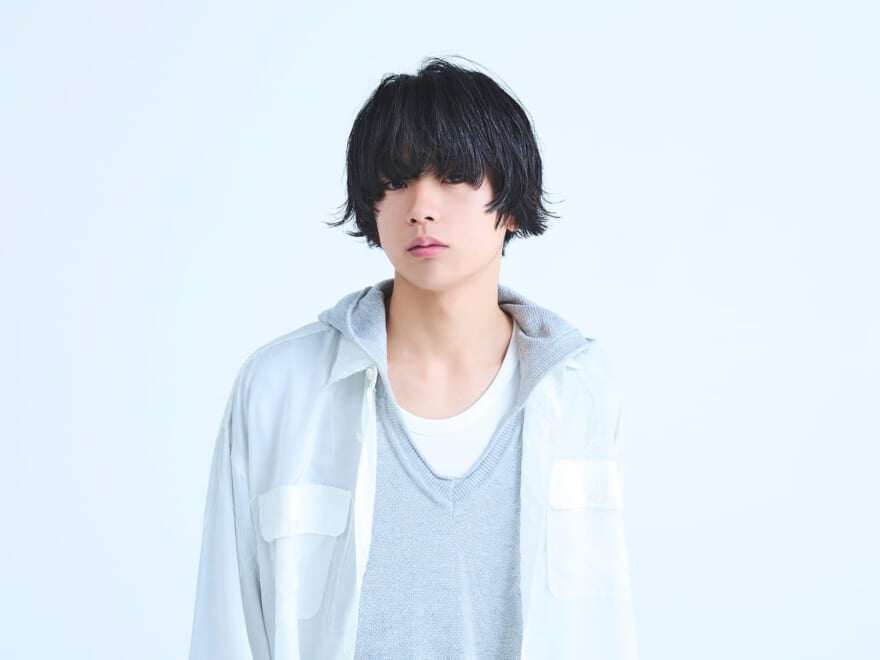
Tシャツ/スタイリスト私物
Photos:Takahiro Idenoshita(model) Naomi Ito(still) Hair & Make-up:KUBOKI[Three PEACE] Stylist:Masashi Sho Model:Shunya Iwakami Composition & Text:Mariko Urayasu
▲ WPの本文 ▲